このページでは、Windows 10/11 を使用している環境で「インターフェイスがサポートされていません」エラーが出る原因と 4つの解決法を紹介します。
「インターフェイスがサポートされていません」エラーが出る原因
「インターフェイスがサポートされていません」エラーが出るのは、Windows Update を実行した後やシステムの復元後、初期化をした後などのタイミングで、ファイルの関連付けやレジストリ内の DLL の登録が解除されてしまった、あるいはアプリケーションが壊れてしまったのが原因だと考えられます。
特に、画像ファイルや動画ファイルを開く際にエラーが出るのではないでしょうか?
「インターフェイスがサポートされていません」エラーの解決法
1.アプリの修復とファイルの関連付けを変更
1.アプリの修復
まず問題が出ているアプリ(フォトなど)の修復、リセットを行います。
1.Windowsキー + R を押して、「ファイル名を指定して実行」を開き、次のコードを入力して Enter を押します。
ms-settings:appsfeatures
2.インストールされているアプリの一覧が表示されますので、対象のアプリの右側の「・・・」をクリックし、「詳細オプション」をクリックします。

3.「修復」をクリックします。

4.修復が終わるとボタンの横にチェックマークが表示されます。

5.次に「リセット」をクリックして実行します。

2.アプリの関連付けを変更
1.画像ファイルや動画ファイルを右クリックし、「プログラムから開く」>「別のプログラムを選択」をクリックします。
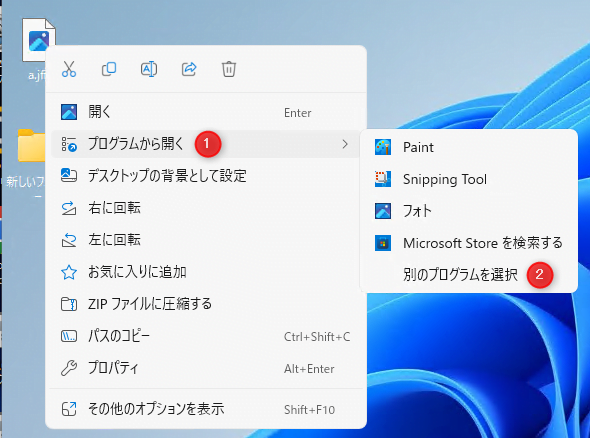
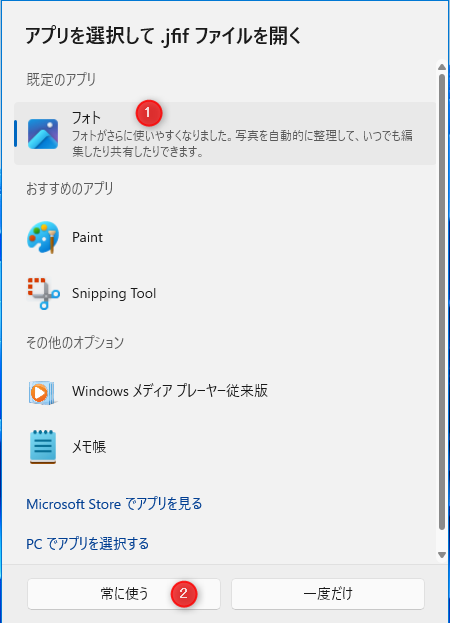
2.表示されているアプリの中から普段使うアプリを選択し、「常に使う」をクリックします。
他に問題がなければ通常通り画像や動画を開くことができるようになります。
まだエラーが出る場合は、まず手順「3」で普段使っていないアプリを選択して「常に使う」をクリックします。
別のアプリが起動したら一度終了し、もう一度手順「3」で普段使うアプリを選択して「常に使う」をクリックしてください。
2.ファイルの関連付けをデフォルトに戻す
上記の方法で解決できない場合は次のページの方法をお試しください。
3.システムの復元後に「インターフェイスがサポートされていません」エラーが出る場合
システムの復元後に「インターフェイスがサポートされていません」エラーが出る場合は、次のページを参考にしてみてください。
Win11 22H2 システムの復元後にアプリが起動できなくなる不具合の対処法
4.DLLファイルの再登録
上記の方法で解決できない場合は DLLファイルの再登録をお試しください。
Windows 11 で DLLファイルの再登録を行うと、Windows セキュリティの「デバイスセキュリティ」に「標準ハードウェア セキュリティはサポートされていません」と表示されてしまう場合があります。原因と解決法は次のページをご覧ください。
1.コマンドプロンプトを管理者として開き、次のコードを入力して Enter を押します。
コマンドプロンプトの開き方を見る
1.Windowsキー + R を押して「ファイル名を指定して実行」を開きます。
2.「cmd」と入力します。
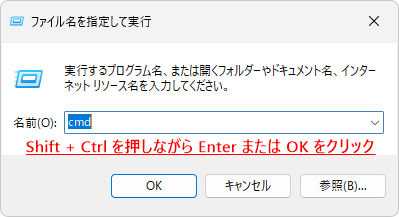
3.Shiftキー + Ctrlキーを押しながら Enter を押してください。

4.「ユーザーアカウント制御」が表示されたら「はい」をクリックします。

cd /d %systemroot%\system32\2.続けて次のコードを入力して Enter を押します。
for %i in (*.dll) do regsvr32 %i /i /s
DLL の登録が開始しますので、しばらくお待ちください。
※途中で「Windows の機能」が表示される場合がありますが、キャンセルして構いません。

3.次の画面のように処理が止まれば、DLLファイルの再登録は完了ですので、× ボタンでコマンドプロンプトを終了してください。

4.PC を一度再起動し、問題が解決されたかを確認してください。