
Windows 11 のパソコンを使っていると、「突然 OS が起動しなくなった」「原因不明のエラーが頻発する」といった、深刻なトラブルに見舞われる可能性があります。
そんな時、OS を再インストールすると、今まで使っていたアプリケーションやドライバー、各種設定もすべて消えてしまい、元の環境に戻すには膨大な時間と手間がかかりますね。
この記事では、Windows 11 に標準で搭載されている機能を使い、あなたが使いやすく設定したアプリやデータがすべて入った状態をイメージファイルとしてバックアップし、フリーソフトを使って「カスタムインストールメディア」を作成する手順を、初心者の方にも分かりやすく解説します。
多少の手間はかかりますが、その分コストをかけずに目的を達成できるのが大きな利点です。
なぜ「カスタムインストールメディア」がおすすめなのか?
まず、「カスタムインストールメディア」とは何か、そしてそれが通常の Windows インストールメディアとどう違うのかをご説明します。
ここで作成するのは、Windows の専門用語でいう「システムイメージ」ですが、これはまさしく「自分だけの環境を復元するための最強のメディア」と呼べるものです。
通常のインストールメディアとの決定的な違い
通常のインストールメディア(Microsoft の公式サイトからダウンロードするもの)と、今回作成する「カスタムインストールメディア(システムイメージ)」の違いは一目瞭然です。
| 項目 | 通常のインストールメディア | カスタムインストールメディア(システムイメージ) |
| OS の状態 | クリーン | バックアップした特定時点の状態 |
| アプリケーション | 無し(すべて手動で再インストール) | すべてインストール済み |
| 各種設定 | すべて初期設定 | すべて設定済み |
| 個人ファイル | 無し(別途バックアップが必要) | すべてバックアップ済み |
| 復元後の手間 | 非常に時間がかかる | すぐに元の作業に戻れる |
つまり、通常のインストールメディアが「まっさらな Windows」をインストールするだけなのに対し、カスタムインストールメディアは、あなたの PC 環境(Windows がインストールされている Cドライブ)そのものを復元できるのです。
「カスタムインストールメディア」はどんな時に役立つのか?
この「カスタムインストールメディア」があれば、以下のような深刻なトラブルが発生しても、バックアップ作成時の状態に PC を完全に戻すことができます。
| トラブルの例 | どのように役立つか |
| HDD/SSDの物理的な故障 | 新しい HDD/SSD に交換し、「カスタムインストールメディア」からインストールすれば、元の環境が完全に再現される。 |
| OSが起動しなくなる | 「カスタムインストールメディア」は通常のインストールメディアと同様に、インストールメディアから起動することができます。そこから「PC を修復する」を選択し、 Windows 回復環境(WinRE)から修復等もできます。 |
| ウイルスに感染した | ウイルスに感染したとしても、感染前の状態に復元することで、被害から回復できる。 |
| PCのアップグレード時 | 例えば、容量の小さい HDD から大容量の SSD へ換装する際に、環境を丸ごと引っ越し(移行)できる。 ※ハードウェアの変更後には、再ライセンス認証が必要になる場合があります。 |
【準備編】カスタムインストールメディア作成に必要なもの
カスタムインストールメディアを作成するには、事前に済ませておくべき準備や満たすべき条件がいくつかあります。
- 無料でカスタムインストールメディアを作成するのはメリットもありますし、デメリットもあります。記事全体をよく読み、内容を把握してから実行することをおすすめします。
- Windws 11 の「パッケージ版」「DSP版」「OEM版」の違いを知っておく必要があります。
- 拡張子は常に表示しておくことをおすすめします。
1.正規の Windows 11 を使用していること、PC が対応していること
非正規の Windows 11 を使用している場合、カスタムインストールメディアを使ってインストールすることができない場合があります。
また、インストールが成功しても、ライセンス認証ができない場合があります。正規の Windows 11 を使用している場合は、インストール時にライセンスキーを入力して進めることができます。
現在一部のネットショップでは、Windows 11 に対応していない PC に非正規の方法でインストールして販売しています。
また、正規の価格よりもはるかに安く販売されている Windows 11 のパッケージ版に含まれるプロダクトキーや単独で販売されているプロダクトキーのほとんどは不正なものであり、ライセンス認証ができなくなる可能性があります。
Windows 11 どっちがお得?パッケージ版とオンラインコード版
2. 作業に必要な領域、メディアとなる保存媒体を用意する
カスタムインストールメディア(システムイメージ)は OS やアプリを丸ごと保存するため、非常に大きなファイルサイズになります。
現在お使いの Cドライブの使用量以上の空き容量がある保存先を用意しましょう。
- 推奨:外付け HDD または SSD
- 内蔵の別ドライブ(Dドライブなど)
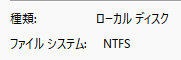
【重要】 保存先のドライブは「NTFS」という形式でフォーマットされている必要があります。市販の外付け HDD は通常 NTFS ですが、念のため確認しておきましょう。(ドライブのプロパティから確認できます)
Windows 11 Cドライブの空き領域はどれくらいが最適?
起動可能な USBドライブを作成する場合は、さらに専用の USBメモリまたは外付けHDD の用意が必要になります。必要な容量は、完成したカスタムインストールメディア(ISO ファイル)の大きさによります。
3.Windows 11 の ISO イメージのダウンロード
カスタムインストールメディアを作成するには、Windows 11 の ISO イメージが必要になりますので、次のページを参考にダウンロードし、保存先のドライブに保存しておきましょう。
4.AnyBurn をダウンロード
ISO イメージを編集できるソフト AnyBurn をダウンロードし、保存先のドライブに保存しておきましょう。
※一番上の AnyBurn Free にある「Download 64-bit edition」をダウンロードしてください。

5.ボリュームの名前(ボリュームラベル)を変更しておく
Windows は各ドライブを「C」や「D」といったアルファベットで識別しますが、これだけではバックアップ元と保存先を間違えてしまう危険性があります。
特に、複数のストレージを接続している場合は、「ローカルディスク(D:)」のような初期名のままだと、どちらがどちらか一瞬で判断がつきません。
このような単純なミスを防ぐために、バックアップ作業を始める前に、それぞれのドライブに分かりやすい名前(ボリュームラベル)を付けておくことを強く推奨します。
1.エクスプローラーを開き、「PC」を開いてください。
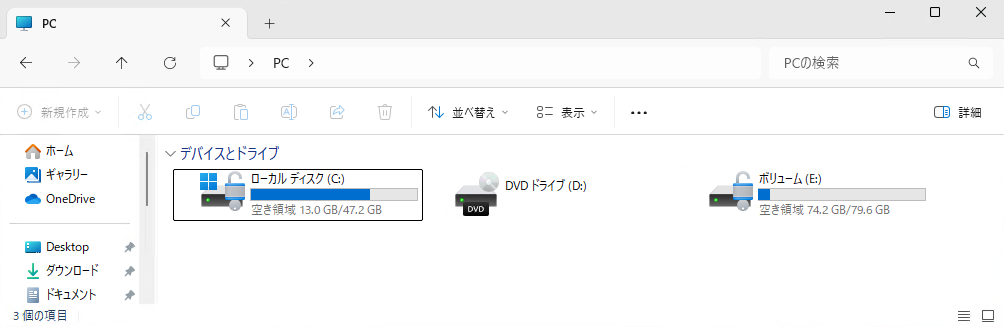
- C:(Cドライブ) が Windows 11 がインストールされているドライブです。
- E:(Eドライブ) が保存先のドライブだとします。この 2つの名前(ボリュームラベル)は、デフォルトでは「ローカルディスク」や「ボリューム」と表示されています。
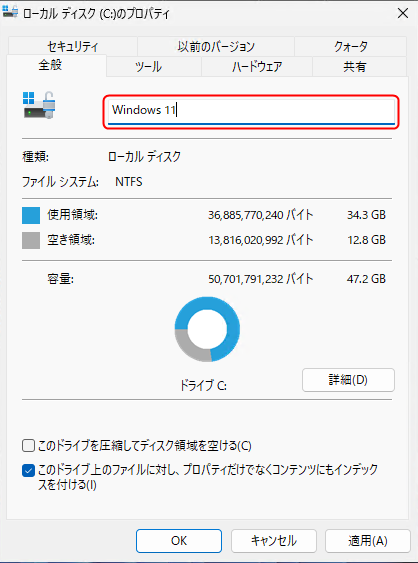
2.Cドライブの上で右クリック>「プロパティ」をクリックします。
3.プロパティが開いたら、赤枠の部分が空白になっていると思いますので、短くてわかりやすい名前「Windows 11」などを入力し、下の OK をクリックしてください。
4.アクセス拒否「このドライブの名前を変更するには管理者の権限が必要です」と表示されますので、「続行」をクリックします。
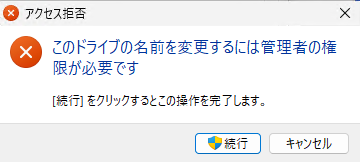
すると、Cドライブの名前(ボリュームラベル)が「Windows 11」に変更されます。
5.保存先のドライブも同様に、名前(ボリュームラベル)を変更してください。(例:Win11_BackUp ← これは 12文字)

ボリューム名は、できるだけ 11文字までにしておきましょう。
6.保存先のドライブにテキストファイルを作成
イメージファイルを作成するためのコマンドは長く、入力が面倒です。ここでテキストファイルを作成しておくと、後の作業が楽になります。
1.保存先のドライブを開き、「新規作成」>「テキストファイル」をクリックします。
2.次の内容をコピーして貼り付け、保存してください。
dism /capture-image /imagefile:Z:\install.wim /capturedir:Z:\ /Name:Windows11_MarugotoBackUpWindows11_MarugotoBackUpの部分は自由に変更して構いません。(英数字および< > : " / \ | ? *以外の記号)
3.テキストファイルの名前を「1」に変更します。

7.BitLocker の無効化
BitLocker が有効である場合、回復キーの入力等が面倒なため、「カスタムインストールメディア」を作成する前に無効化しておくことをおすすめします。
これで準備完了です。
【実践編】「カスタムインストールメディア」を作成する全手順
1.OS をイメージとしてバックアップ
1.Windowsキー + R を押して「ファイル名を指定して実行」を開き、次のコマンドを入力して Enter を押します。
ms-settings:recovery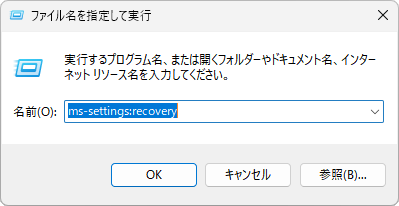
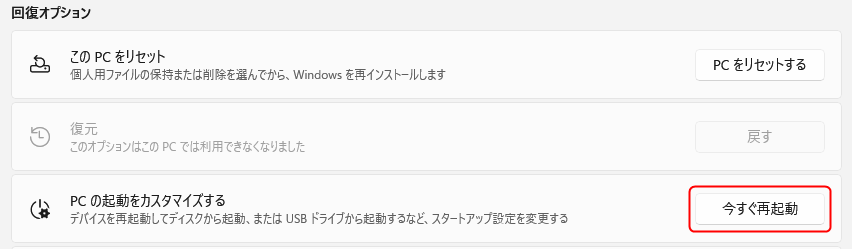
2.「設定」>「システム」>「回復」が開きますので、「PC の起動をカスタマイズする」の右側の「今すぐ再起動」をクリックします。
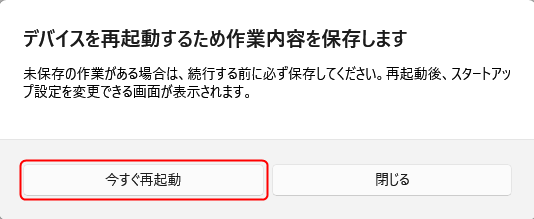
3.「デバイスを再起動するため作業内容を保存します」と表示されますので、未保存の作業があれば保存してから「今すぐ再起動」をクリックしてください。
4.PC が再起動され「Windows 回復環境(WinRE)」が開きますので、「トラブルシューティング」>「詳細設定」>「コマンドプロンプト」を開いてください。
BitLocker の回復キーを求められた場合
BitLocker の回復キーを求められた場合は、48桁の回復キーを入力して「続行」をクリックします。
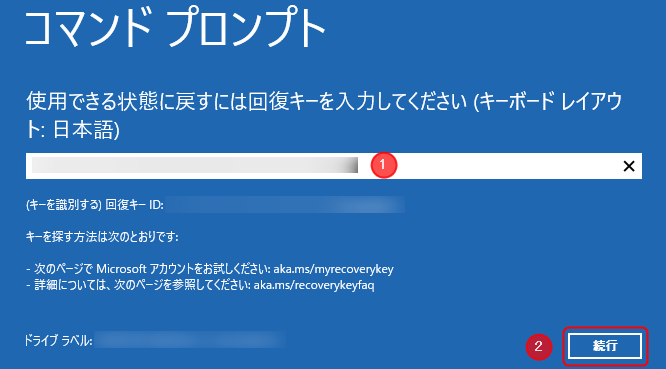
5.コマンドプロンプトが開いたら、次のコマンドを入力して Enter を押します。
diskpartDISKPART>と表示されたら、次のコマンドを入力して Enter を押します。
list volume6.すると、ボリュームのリストが表示されますので、先ほど変更したボリューム名の左側のアルファベットを覚えておいてください。
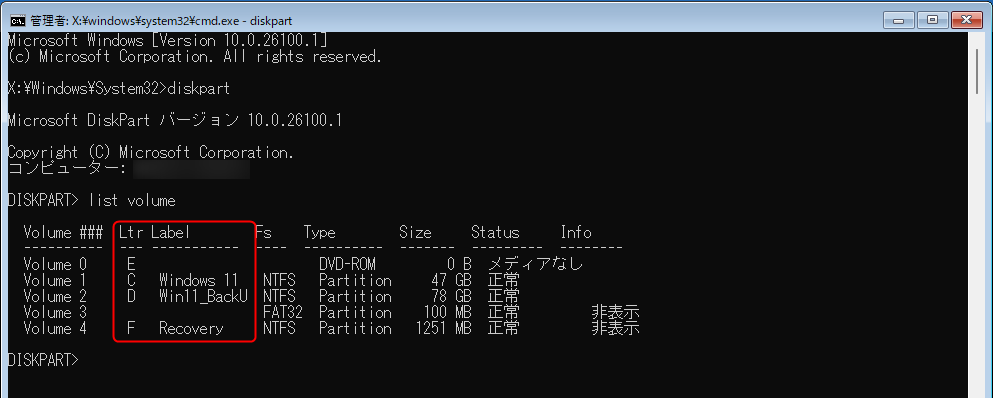
ボリューム名の左側のアルファベットは環境により変わります。
上の画像では OS のインストールされているドライブが「C」となっていますが、必ずしも「C」になるとは限りません。そのため、必ずボリューム名とアルファベットの確認を行ってください。
7.exitと入力して Enter を押してください。(DiskPart を終了します。)
8.ここで先ほど保存先のドライブに作成したテキストファイルを使います。
上の画像では、保存先のドライブの左側のアルファベットが「D」となっていますので、次のように入力して Enter を押します。
type d:\1.txt
9.すると、テキストファイルの内容が表示されますので、マウスでドラッグして内容を選択し、キーボードの Ctrl + C を押してコピーしてください。

10.キーボードの Ctrl + V を押して貼り付けます。
11.キーボードの ← を押して左に移動し、一番最初のZを削除して保存先のドライブのアルファベットに変更します。
12.キーボードの → を押して右に移動し、次のZを削除して OS(Windows 11)がインストールされているドライブのアルファベットに変更します。
- Back Spaceキーを押すと、選択している文字の前の文字を削除します。
- Deleteキーを押すと、選択している文字を削除します。
- 変更するのは 2つの「
Z」のみです。
dism /capture-image /imagefile:Z:\install.wim /capturedir:Z:\ /Name:Windows11_MarugotoBackUp
手順9~12 を行っている動画
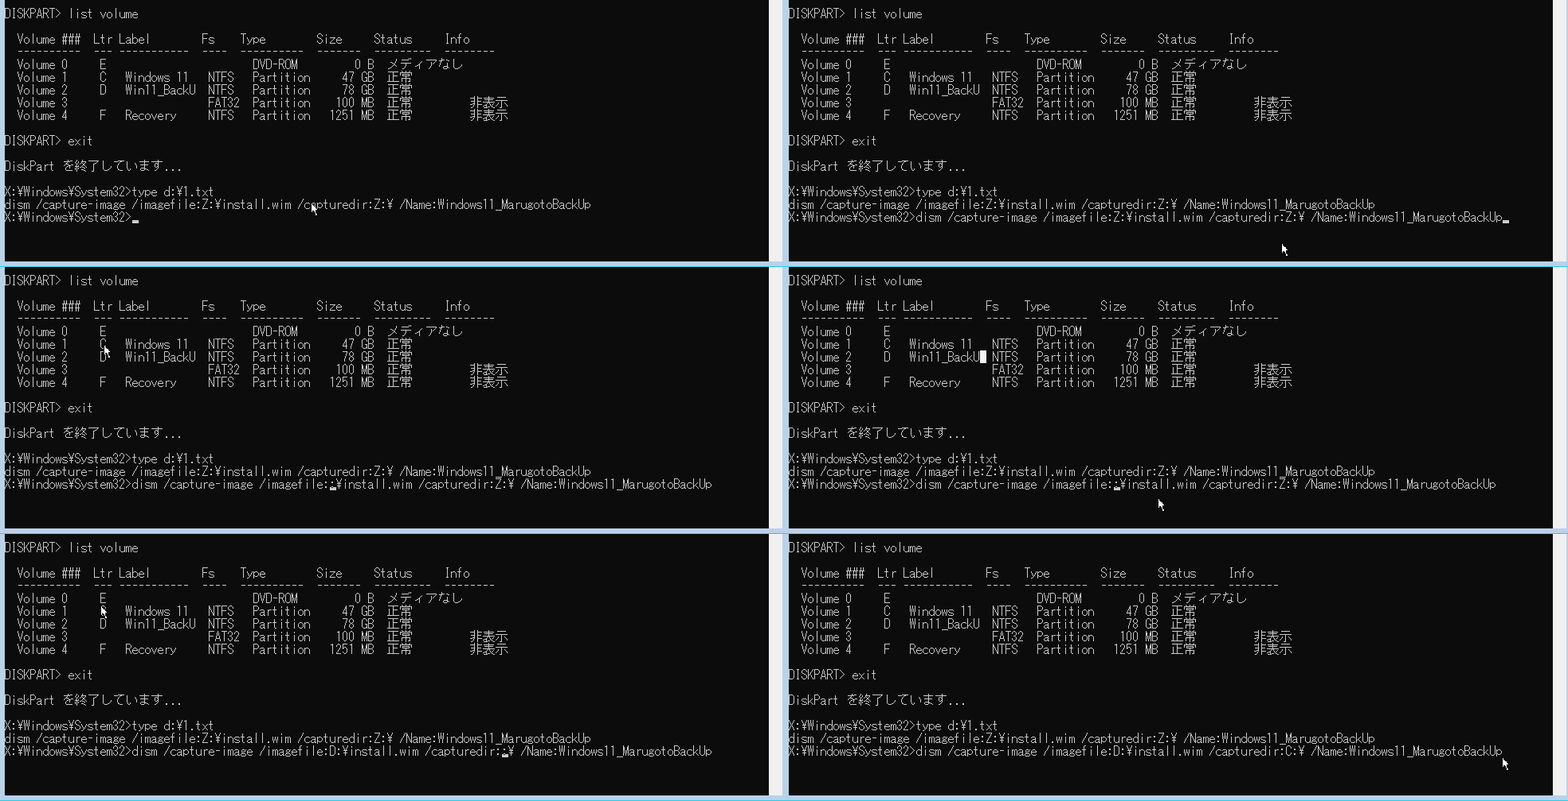
13.コマンドの変更が完了したら、Enter を押します。
14.すると、OS(Windows 11)のバックアップが開始しますので、そのままお待ちください。
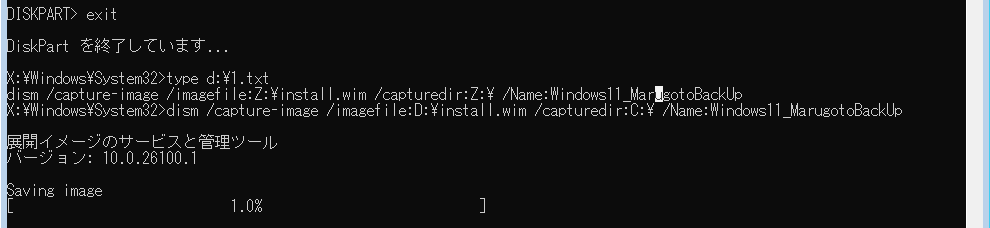
バックアップにかかる時間は、筆者の環境では 50分ほどでした。約1分で 2%進む感じでした。
筆者の環境:
- OS がインストールされているドライブ(NVMe M.2)の使用量「195GB」を USB接続の外付けHDD に保存
- 作成されたイメージの大きさは 67.5GB(195GB の 34.62%)


15.「操作は正常に完了しました。」と表示されたら、右上の × ボタンをクリックしてコマンドプロンプト終了します。
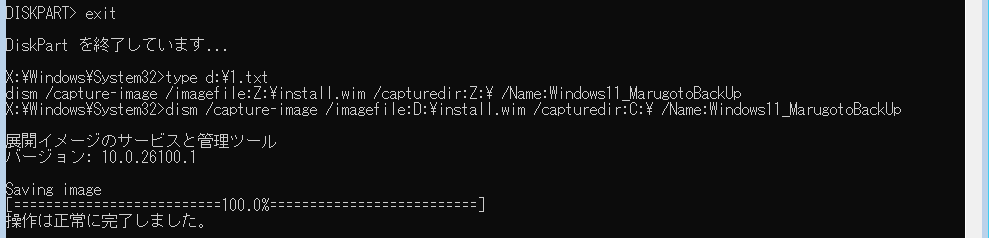
16.オプションの選択画面に戻りますので、「続行」をクリックし、Windows 11 を起動します。
17.Windows 11 が起動したら、保存先のドライブに「install.wim」が作成されているかを確認してください。

2.インストールメディアを作成
1.保存先のドライブに保存しておいた「anyburn_setup_x64.exe」を実行して AnyBurn をインストールを進めてください。
※AnyBurn のページが開いたら閉じて構いません。
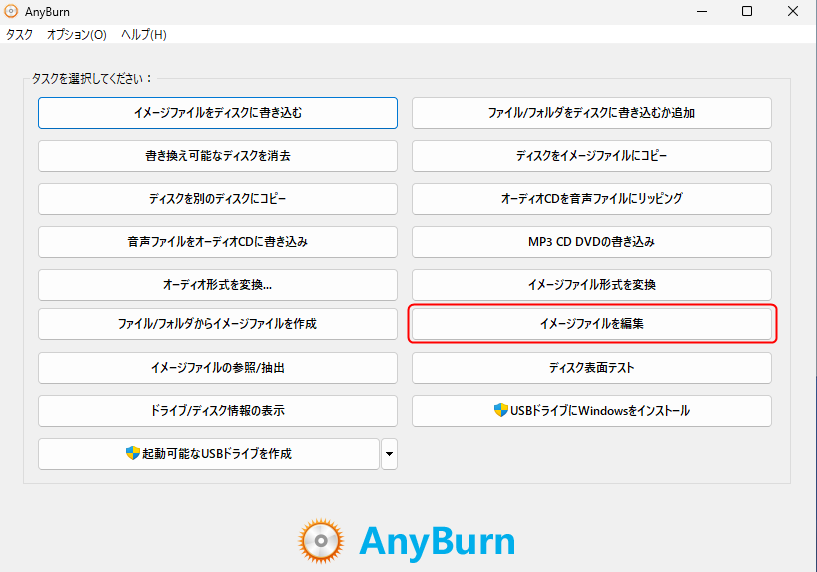
2.AnyBurn が起動したら、「イメージファイルを編集」をクリックします。
Cドライブの空き領域が不足している場合
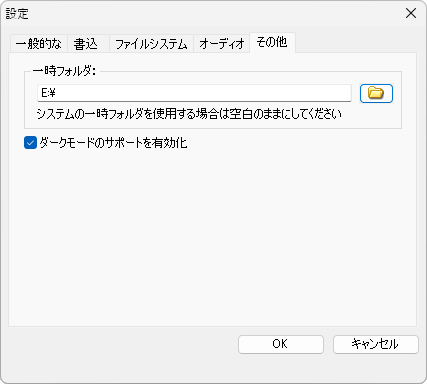
1.メニューの「オプション」をクリックします。
2.設定が開きますので、「その他」タブを開き、「一時フォルダ」の右側にあるアイコンをクリックします。
3.空き領域が十分にあるドライブを選択して OK をクリックします。
3.右側のフォルダーのアイコンをクリックします。

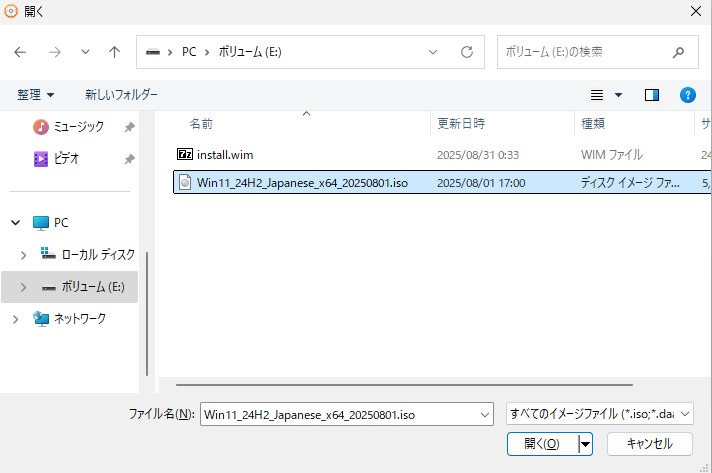
4.ここでは、Microsoft のページからダウンロードした ISO ファイルを選択し、「開く」をクリックします。
5.ISO ファイルの中身が表示されますので、「sources」フォルダーをダブルクリックして開きます。
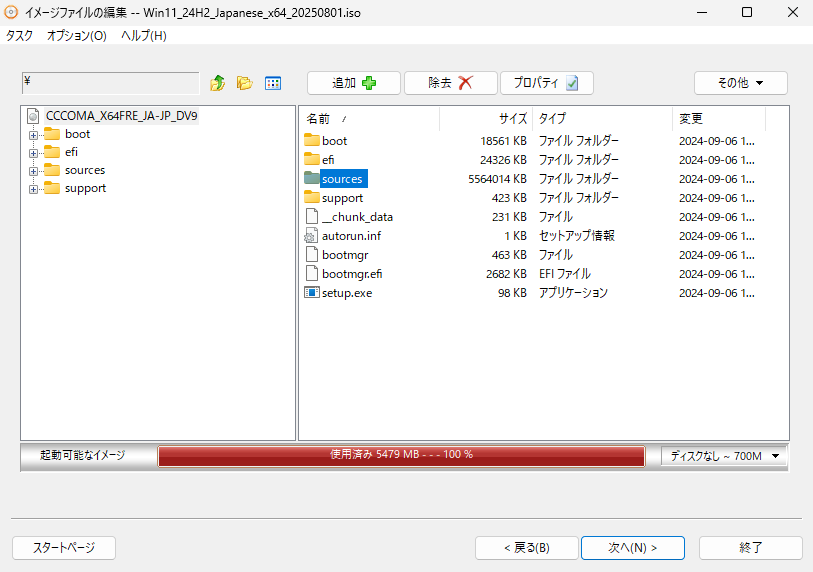
6.「サイズ」という文字の部分を 2回クリックすると、サイズの大きいファイルが一番上に来ます。
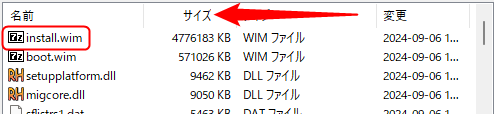
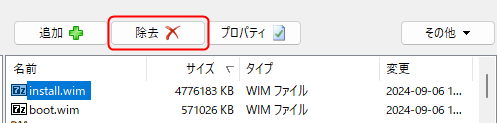
7.この一番大きいファイル「install.wim」を選択してから、上の「除去」ボタンをクリックします。
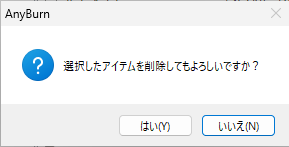
8.削除の確認が表示されますので、「はい」をクリックします。
9.「install.wim」が削除されましたので、「追加」ボタンをクリックします。

10.ここでは、保存先のドライブにある「install.wim」を選択して「追加」をクリックします。
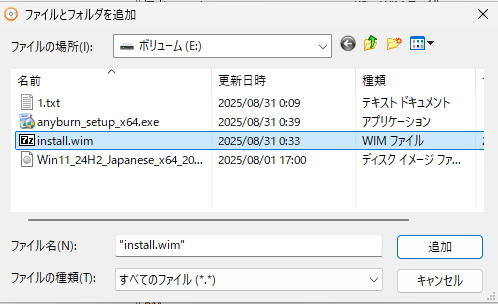
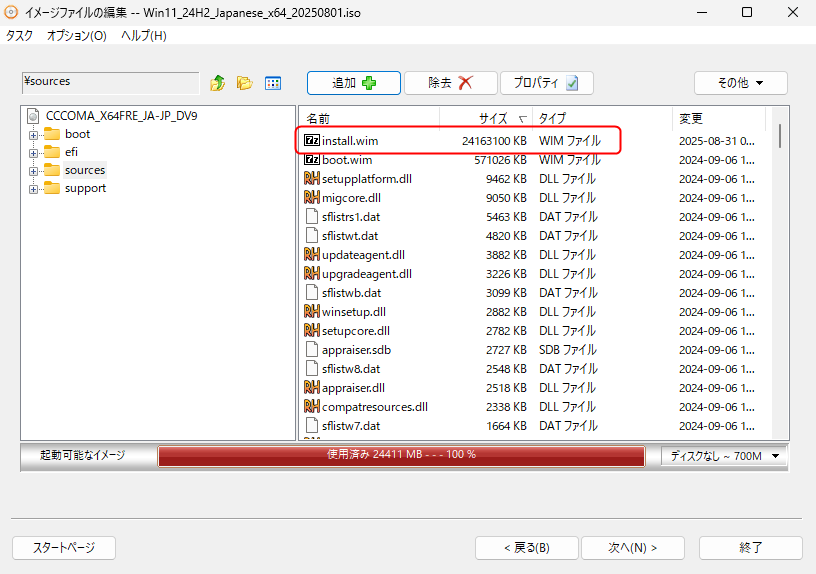
11.「install.wim」が追加されたことを確認したら、「次へ」をクリックします。
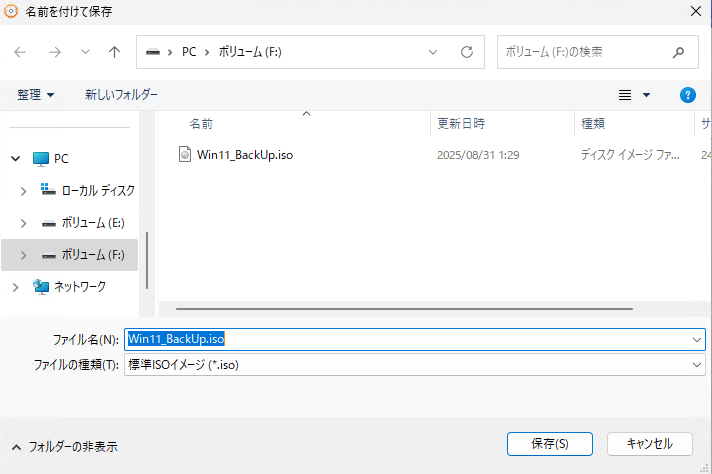
12.「イメージファイル名を選択」の右側にあるアイコンをクリックします。

13.インストールメディアを保存する場所を選択し、名前を付けて「保存」をクリックします。
14.確認ができたら「今すぐ作成」 をクリックします。
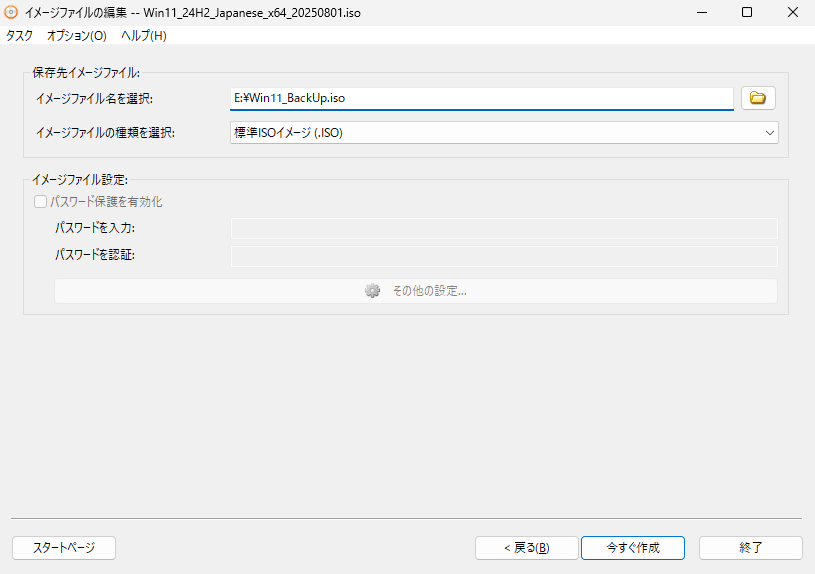
15.インストールメディアの作成が開始しますので、完了するまでお待ちください。
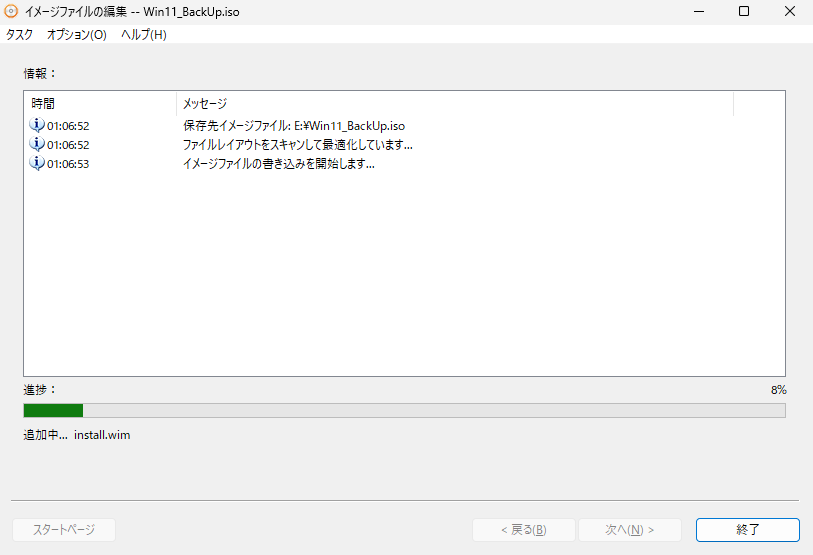
16.作成が完了したら、「終了」をクリックし、カスタムインストールメディアの作成は完了です。
ISO ファイルをマウント(ISO ファイルの上で右クリック>「マウント」をクリック)すると、エクスプローラーで中身が見えるようになりますので、「setup.exe」を実行してインストールをすることもできますが、起動可能な USB ドライブを作成しておくことをおすすめします。
起動可能な USB ドライブを作成する
起動可能な USB ドライブ専用の USBメモリまたは外付けHDD を用意し、フォーマット(NTFS)しておくことが必要になります。完成したカスタムインストールメディア(ISO ファイル)の大きさ以上の容量が必要です。
1.AnyBurn の最初の画面で「イメージファイルの参照/抽出」をクリックします。

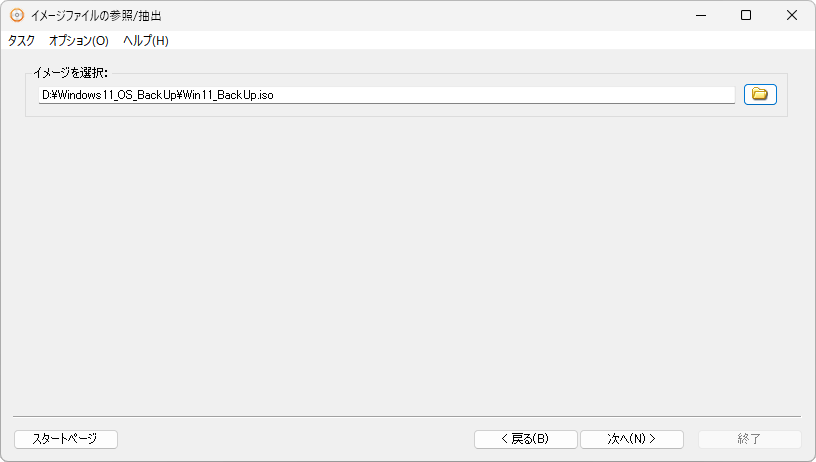
2.作成したカスタムインストールメディアを選択し、「次へ」をクリックしします。
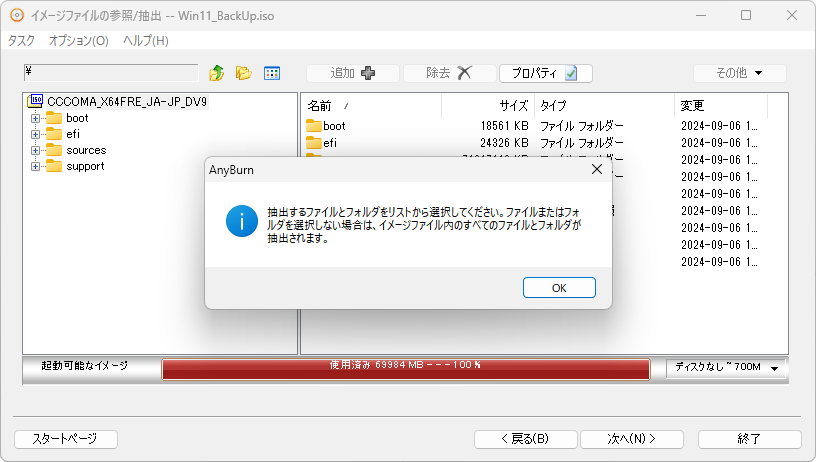
3.「抽出するファイルとフォルダーをリストから選択してください。」と表示されますので、OK をクリックします。
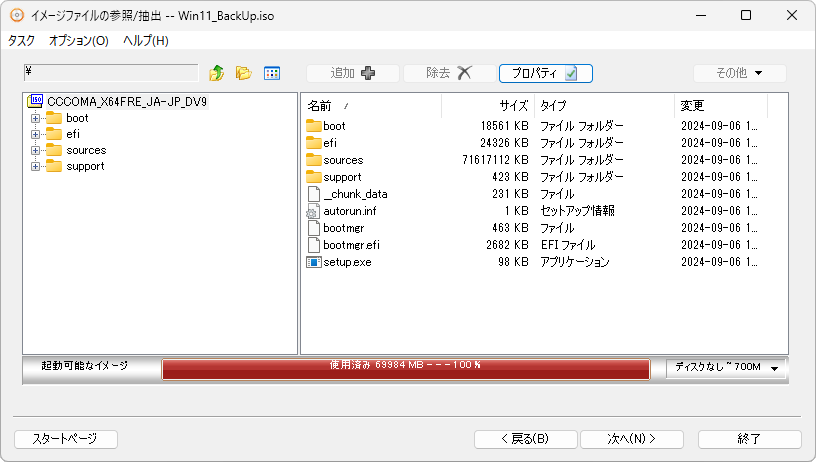
4.何も選択せずに「次へ」をクリックしします。
5.抽出先は、起動可能な USB ドライブ専用の USBメモリまたは外付けHDD を指定します。
「イメージファイル内のすべてのファイルとフォルダーを抽出」が選択されていることを確認したら「次へ」をクリックします。
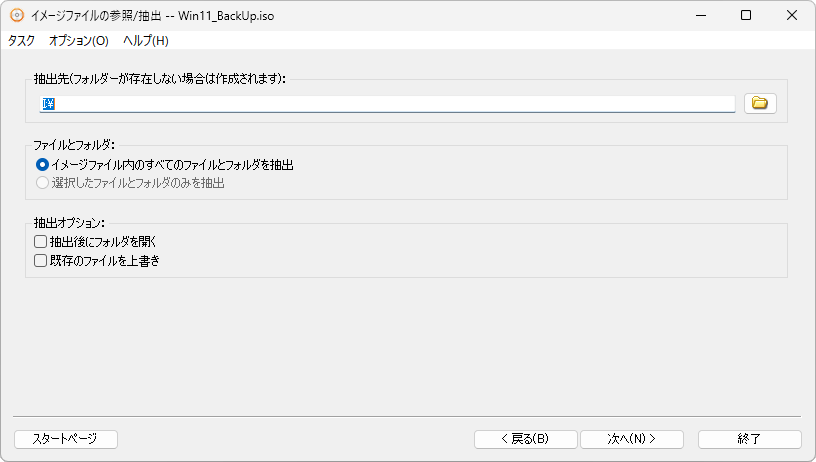
6.すると、すぐに抽出が開始しますので、完了するまでお待ちください。
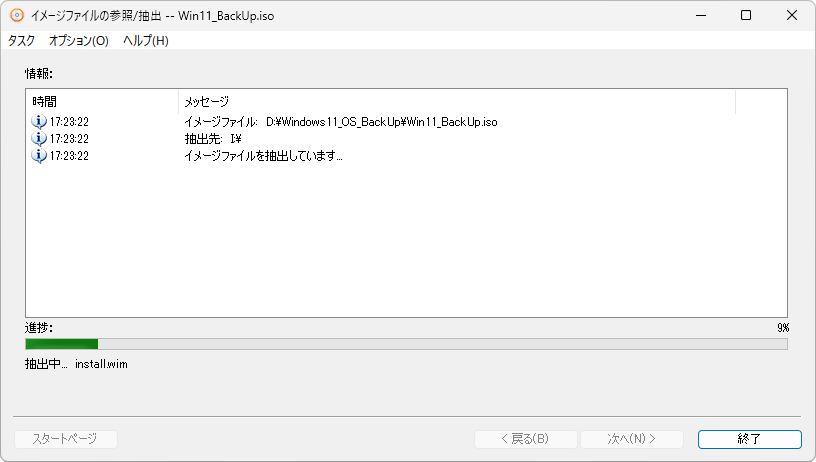
なぜ「起動可能なUSBドライブを作成」で作成しないの?
AnyBurn の「起動可能なUSBドライブを作成」で完成したカスタムインストールメディアを書き込むと、設定が上書きされ、USB からの起動が失敗するためです。
カスタムインストールメディアは既に起動(ブート)可能なインストールメディアであるため、ISO ファイル内のすべてのファイルとフォルダーを抽出するだけで良いのです。
カスタムインストールメディアを使ってインストールする際の注意事項
インストール時
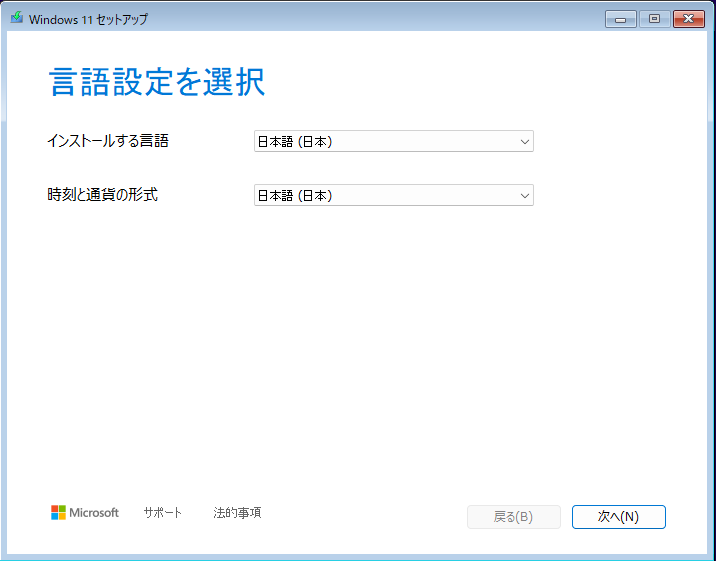
カスタムインストールメディアを使ってインストールする場合、Windows 11 のセットアップ画面が表示された後にそのまま進めるとインストールが失敗します。そのため、次の手順でインストールを進めてください。
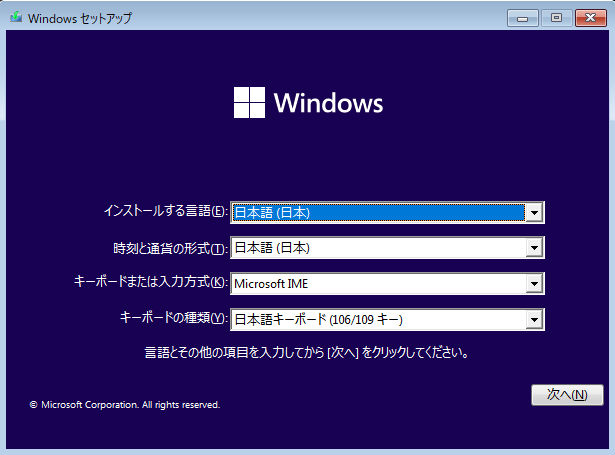
1.「言語設定を選択」が表示されたら「次へ」をクリックします。
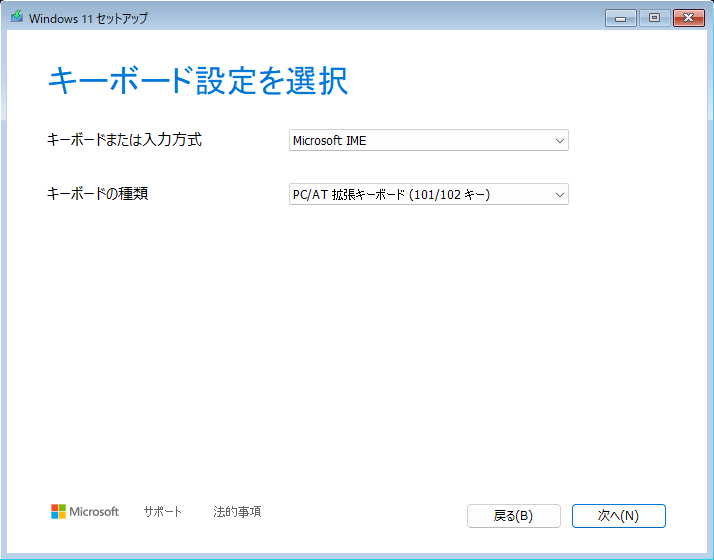
2.「キーボード設定を選択」が表示されたら、そのまま「次へ」をクリックします。
3.「セットアップオプションの選択」画面で、左下の「セットアップの以前のバージョン」をクリックしてください。
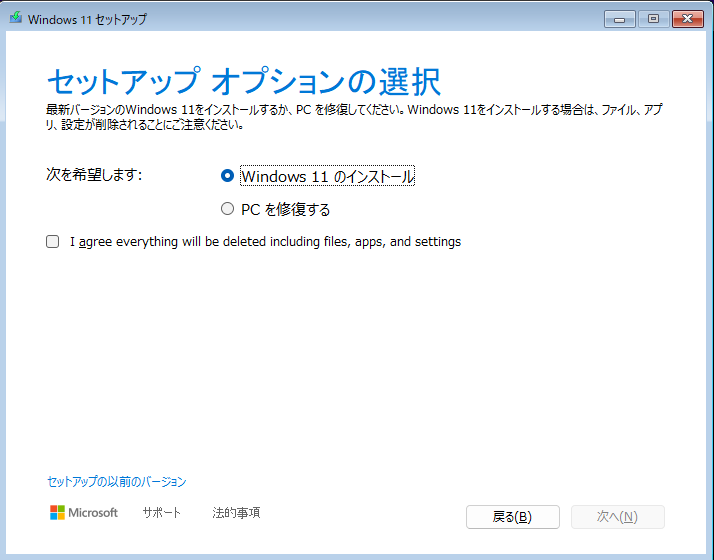
4.すると、以前のバージョンの Windows セットアップ画面が表示されますので、そのままインストールを進めてください。
インストール後
1.サインイン時に PIN の再設定が必要になる場合があります。
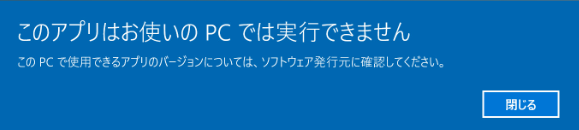
2.初めてのサインイン後、「このアプリはお使いの PCでは実行できません」という画面が数回表示される場合がありますが、問題ありませんので構わず閉じてください。
3.デスクトップやタスクバーにピン留めしている一部のアプリのアイコンが白くなる場合があります。
デスクトップにある一部のアプリのアイコンが真っ白になるバグの対処法
まとめ
無料バックアップと有料ソフトの違い
ここまで Windows の標準機能を使ったバックアップ方法、そのバックアップをフリーソフトでカスタムインストールメディアにする方法をご紹介しましたが、Acronis True Image のような専門の有料ソフトには、無料版にはない以下のようなメリットがあります。

 ポチップ
ポチップ
- 復元の速さと手軽さ: 数クリックでシステム全体を高速に復元できます。
- 高度な保護機能: ファイルが人質に取られる「ランサムウェア」から、バックアップデータを積極的に保護する機能があります。
- 柔軟なバックアップ: OS が起動しなくなっても、USB メモリから起動して復元できます。
- 操作の分かりやすさ: 初心者でも迷わないよう、画面の指示が非常に親切です。
【こんな人には有料ソフトがおすすめ】
- PC のトラブルに時間をかけたくない方
- 仕事のデータなど、絶対に失いたくない重要なファイルがある方
- より確実な安心を手に入れたい方
無料の方法でも基本的なバックアップは可能ですが、「時間」と「より高度な安心」を買うという意味で、有料ソフトは非常に優れた選択肢になります。ご自身の環境に合わせて、最適な方法を選んでください。

コメント