このページでは、Windows 11 を使用している環境で Windows Update の実行時に「0x80190001」エラーが出る場合の原因と修復法を紹介します。
「0x80190001」エラーの原因と修復法
「0x80190001」エラーは、通常は更新プログラムのダウンロードとインストール中に発生し、システムの速度の低下やフリーズも同時に発生する場合があります。
原因
この問題の一般的な原因には、次の 3つがあります。
- 誤った時刻と日付が設定されている
- システムファイルが破損している
- 互換性のないサードパーティ製のセキュリティソフトがインストールされている
修復法
セキュリティソフトを一時停止してみる
Windows Update を行う前に、セキュリティソフトを一時停止してから実行してみましょう。
一部のセキュリティソフトは Windows Update に干渉して更新が失敗することがあります。
PC の再起動をしてみる
PC を長期間再起動していない場合、システムが不安定になる場合があります。
再起動をすることで簡単に治ってしまうこともありますので、まずは再起動を試してみましょう。
通常の再起動では解決できない場合がありますので、その場合は次の方法をお試しください。
再起動方法
まず高速スタートアップの無効化方法を参考に「高速スタートアップ」を無効にし、スタートボタンからシャットダウンを実行します。
PC の電源が切れたら、PC の電源のコンセントを抜き、30秒以上放置してからコンセントを挿し、電源を入れます。
ノート PC の場合、コンセントを抜いたらバッテリーを外しておき、30秒以上放置し、バッテリーをセットしてからコンセントを挿して電源を入れます。
Windows Update トラブルシューティング ツールを実行する
次の記事を参考に、Windows Update のトラブルシューティングを実行してみましょう。
Windows10/11 トラブルシューティングツールを使って問題を解決する
日時の確認
Windows Update は、日時が間違って設定されている場合、「0x80190001」エラーが出て更新に失敗することがあります。
Windowsキー + R を押して、「ファイル名を指定して実行」を開き、次のコードを入力して Enter を押します。
ms-settings:dateandtime「日付と時刻」が開きますので、日付と時刻が正しいか、「時刻を自動的に設定する」がオンになっているかを確認してください。

もしもオンに設定されているのに日付と時刻が違っている場合、オフに設定し、下にスクロールして「日付と時刻を手動で設定する」の右側にある「変更」をクリックして手動で入力しましょう。


日付と時刻は定期的に確認しましょう。
日時がずれている場合、Windows Update で更新プログラムのチェック時に無視される可能性があります。

システムファイルの修復
上記の方法で解決できない場合、システムファイルの破損が考えられますので、修復を実行します。
次の記事を参考にシステムファイルの修復を行ってみてください。
Win10/Win11 システムファイルの修復「システムファイルチェッカー」
システムファイルの修復で解決できない場合、Windows イメージの修復を試します。
コマンドプロンプトを管理者として開き、次のコードを入力して Enter を押します。(イメージのチェック)
コマンドプロンプトの開き方を見る
1.Windowsキー + R を押して「ファイル名を指定して実行」を開きます。
2.「cmd」と入力します。
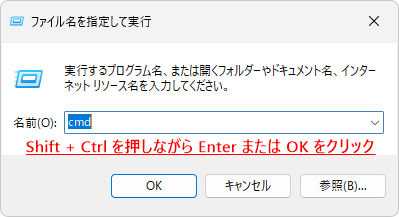
3.Shiftキー + Ctrlキーを押しながら Enter を押してください。

4.「ユーザーアカウント制御」が表示されたら「はい」をクリックします。

DISM.exe /Online /Cleanup-image /Scanhealthイメージの修復が出来るかのチェックが開始しますので、そのまま終わるまで待ちます。

「コンポーネント ストアは修復できます。操作は正常に完了しました。」と表示されたら

そのまま次のコードを入力して Enter を押します。
DISM.exe /Online /Cleanup-image /Restorehealthイメージの修復が開始しますので、修復が終わるまで待ちましょう。(少々時間がかかります)

「復元操作は正常に完了しました。」と表示されたら、コマンドプロンプトを終了し、もう一度 Windows Update を実行してみましょう。
SoftwareDistribution フォルダーをクリーンアップする
Windows 11 バージョン 23H2 へのアップデートが失敗する場合の解決法を参考に、SoftwareDistribution フォルダーをクリーンアップしてから Windows Update を実行してみましょう。
クリーンブートを実行
1.Windowsキー + R を押して、「ファイル名を指定して実行」を開き、次のコードを入力して Enter を押します。
msconfig2.「システム構成」が開きますので、全般タブの「スタートアップの選択」で、通常は「通常スタートアップ」が選択されていますが、「スタートアップのオプションを選択」をクリックし、「スタートアップの項目を読み込む」のチェックを外します。

3.そのままサービスタブを開き、左下にある「Microsoft のサービスをすべて隠す」にチェックを入れ、「適用」をクリックします。

4.OK をクリックしてシステム構成を閉じます。
5.次にタスクマネージャーを開き、スタートアップタブで不要な項目を無効にします。(わからない場合はそのままにしておきましょう)
6.PC を再起動してから Windows Update を実行してみましょう。
これらの方法でほとんどは解決できるかと思いますが、解決できない場合は初期化が必要になるかもしれません。
コメント