2026年1月29日にリリースされた Windows 11 のプレビュー更新プログラム KB5074105、および次回以降の正式版アップデートは、これまでの準備段階を終え、セキュアブート更新の「通常展開」を開始する重要な転換点です。
当サイトでは、この影響と対策を正確にお伝えするため、実機を用いて意図的に「セキュアブート違反で起動しない状況」を再現し、そこからの完全復旧までを実際に検証しました。
KB5074105 に限らず、これ以降の更新を適用するすべての Windows 11 ユーザー(バージョン 24H2 / 25H2)において、PC の起動プロセスが物理的に書き換わることになるため、その内容を正しく理解し、万が一の事態に備える必要があります。
KB5074105(プレビュー)およびそれ以降の正式版で何が起きるのか?
今回の更新(プレビュー版を含む今後のすべてのアップデート)では、すでに「Windows UEFI CA 2023」証明書が BIOS(DB)内に存在するデバイスを対象に、ブートマネージャーの置き換えが順次実行されます。
- 署名の刷新と事前確認: これまで使われてきた「2011年署名」の
bootmgfw.efiが、新しく「2023年署名」のbootmgfw.efiに置き換わります。 ただし、一部の環境によっては、今回の更新をインストールする前に、すでに新しいファイルへ置き換わっている可能性があります。ご自身の PC が現在どちらの署名を使っているかは、手動で調べるか、下記ページで公開しているツールで簡単に確認できます。 - 通常展開への移行: これまでは手動設定や段階的な準備期間でしたが、本パッチおよび次回の正式版をもって、システムによる自動的な「実行フェーズ」に入ります。これにより、セキュアブートのセキュリティレベルが強制的に引き上げられることになります。

⚠️ 「セキュアブート違反」が発生するリスク
ここでは、Microsoft が警告している「具体的な操作」を明確にしつつ、なぜそれが危険なのかを解説します。
この更新が適用された後、PC の起動システム(ブートマネージャー)は「2023年版の鍵」がなければ動作しない状態になります。ここで最大のリスクとなるのが、DB(証明書データベース)やセキュアブート設定の操作です。
- 引き金: DB(証明書データベース)のリセット、または セキュアブートのオン/オフを切り替える こと。 ※ 機種によっては「BIOS 設定の初期化(Load Default)」を行うと、連動して DB もリセットされる場合があります。
- 結果: もしこれらの操作によって「2023年版の証明書」の情報が失われてしまうと、BIOS は新しくなったブートマネージャーを「不正なファイル」と誤認します。その結果、「Secure Boot Violation」や「Boot failure」といったエラーが表示され、Windows が起動できなくなります。(セキュアブート違反)
Boot failure : a proper digital signature was not found. One of the files on the selected boot device was rejected by the Secure Boot feature.
日本語訳:
ブート失敗: 適切なデジタル署名が見つかりませんでした。選択したブートデバイス上のファイルの 1つがセキュアブート機能によって拒否されました。

【実証済み】なぜセキュアブートを「オン・オフ」するだけで起動不能になるのか?
公式ドキュメントにある「設定のオン・オフが違反を招く」という一文について、当サイトでマイクロソフトの技術サポートへ直接問い合わせ、その詳細なメカニズムを確認しました。
[セキュア ブート] Windows 11バージョン 24H2 のこのリリースでは、セキュア ブート署名データベース (DB) に Windows UEFI CA 2023 証明書が既に存在するデバイスで、ブート マネージャーで更新プログラムが実行されます。 これは、2011 署名された bootmgfw.efi を 2023 署名された bootmgfw.efi に置き換えます。 DB をリセットしたり、セキュア ブートをオンまたはオフにしたりすると、”セキュア ブート違反” の問題が発生する可能性があるため、その結果を確認してください。 このようなまれなケースでは、ソリューションはセキュア ブート回復メディアを作成することです。
Microsoft
判明した原因は、OS の不具合ではなく、BIOS(ファームウェア)との間に発生する「信頼のミスマッチ」でした。
- Windows Update 時の動作: アップデートが実行される瞬間、Windows は BIOS 内に「2023年証明書」があることを正しく確認しています。そのため、正常に 2023年署名版のブートマネージャーがインストールされます。
- 「オン・オフ」が引き金になる理由: 問題はその後です。セキュアブートをオフにしたり、設定を切り替えたりした際、一部の BIOS の挙動として、新しく追加された「2023年証明書」をリストから勝手にドロップ(削除・忘却)してしまうことがあります。
- 再有効化時のエラー: この「証明書を忘れた状態」でセキュアブートを再びオンにすると、BIOS は「最新のブートマネージャーはあるが、それを認める証明書が(消えてしまったので)手元にない」と判断し、起動をブロック(Secure Boot violation)してしまうのです。
つまり、「Windows Update のチェックは正しく行われているが、その後のユーザー操作によって、BIOS 側が後発的に信頼を失ってしまう」ことがトラブルの正体でした。
Linux とのデュアルブートなどで頻繁に設定を切り替える方は、この「BIOS による証明書のドロップ」が起きるリスクがあるため、万が一に備えて「セキュアブート回復メディア」を用意しておくことが極めて重要です。
当サイトでは、この「セキュアブート回復メディア」の作成方法を、初心者の方でも迷わないよう分かりやすく解説しています。
【MS推奨の対策】
起動不能という最悪の事態を避けるためにも、BIOS(DB)内にすでに「Windows UEFI CA 2023」証明書が存在するデバイスでは、まずこのメディアの作成を完了させておくことを強く推奨します。
【重要】BIOS更新が提供されない古い環境をお使いの方へ
メーカーから 2023年版証明書に対応した BIOS(UEFI)が提供されない「古いPC」で、Windows Update を通じて証明書が更新された環境をお使いの方は、以下の点に厳重に注意してください。
「OS による上書き」と「マザーボードの記憶」の違い
公式ドキュメントには難しい言葉が並んでいますが、要約すると以下のようになります。
「Windows Update を通じて証明書が更新された環境では、OS を介してセキュア ブート アクティブ変数が適用されます。 セキュア ブート ファームウェアの既定値は、OEM によって保持されます。 ……」
Microsoft
これを分かりやすく噛み砕くと、こういうことです。
- Windows Update は「その場しのぎの塗り絵」: OS(Windows)が起動した後に、マザーボードのメモリにある証明書の上から「最新の鍵」を無理やり上書きしています(アクティブ変数の適用)。
- マザーボードは「古い下絵」しか持っていない: PC そのもの(マザーボード)が元々持っている「工場出荷時の既定値」は、メーカー(OEM)が提供する BIOS 更新でしか書き換えられません。
- 「リセット」は塗り絵を消す行為: BIOS メニューで既定値を読み込むと、OS がせっかく上書きしてくれた「最新の鍵」という塗り絵がすべて消え、マザーボードに残っている「古い下絵(2011年の古い鍵)」が露出してしまいます。
マイクロソフトの忠告:メーカーの更新がないなら「触るな」
マイクロソフトの公式ドキュメントには、非常に重要な「釘を刺すような一文」があります。
「OEM がファームウェアの既定値を新しい証明書に変更する更新プログラムをリリースしていない限り、セキュア ブート構成を変更または更新しないことをお勧めします。」
Microsoft
これを今の状況に当てはめると、恐ろしい事実が浮かび上がります。
- OS 側の更新は「綱渡り」: Windows Update は、OS が起動している間だけ「最新の鍵」をメモリ上で有効にしているに過ぎません(アクティブ変数の適用)。
- マザーボードの「既定値」は 2011年のまま: PC 本体(マザーボード)が記憶している「工場の既定値」は、メーカー(OEM)が BIOS 更新を提供しない限り、古いまま置き換わりません。
- 設定変更が「破綻」を招く: メーカーの更新がない状態で BIOS 画面からセキュアブートの設定を「更新」したり「リセット」しようとすると、BIOS は手持ちの古い既定値を使おうとします。その結果、OS 側が施した最新の保護設定と矛盾が生じ、システムが起動不能になるリスクがあるため、マイクロソフトは「安易に触るな」と警告しているのです。
「既定値へのリセット」が致命的になるリスク
Windows Update によって OS 側から証明書が最新に書き換えられていても(アクティブ変数の適用)、BIOS のメニューから 「Load Optimized Defaults(工場出荷時の既定値)に戻す」を実行した瞬間、証明書は古い状態に強制的に戻ります。
最新 Windows との整合性が崩壊する: メーカーが BIOS を更新していない場合、この「リセット」によって 2023年版の署名データがマザーボードから消えてしまいます。これにより、最新のセキュリティが適用された Windows との整合性が取れなくなる 「詰み」の状態 が発生します。
発生する事象: もし OS 側のブートマネージャーが「2023年版の新しい鍵」を要求する設定になっていた場合、マザーボード側が「2011年版の古い鍵」しか出せなくなるため、「セキュアブート違反(Secure Boot Violation)」とみなされて Windows が起動できなくなります。
「詰み」を回避する唯一の方法
メーカーが BIOS を更新してくれない以上、PC の「根の深さ」にある既定値は古いままです。もし BIOS をリセットしてしまい、OS が起動できなくなった場合、「セキュアブート回復メディア」がなければ、二度とセキュアブートを ON のまま起動させることはできません。
【実証済み】回復メディア作成前に「Secure Boot Violation」で起動しなくなった場合の救済策
メーカーが BIOS を更新してくれない以上、PC の「根の深さ」にある既定値は古いままです。 もし、CMOS 電池切れや誤操作で BIOS をリセット(工場出荷時に復元)してしまい、OS が起動できなくなった場合、通常であれば「セキュアブート回復メディア」がなければ、二度とセキュアブートを ON のまま起動させることはできません。
しかし、私が実際に「詰み」の状態(DB内の証明書を手動削除し、起動不能にした状態)から、以下の手順で復旧できることを実証しました。
もし、回復メディアを作る前にトラブルに見舞われた場合は、諦めずに以下の手順を試してください。
【救済フロー:手元にセキュアブート回復メディアがない状態からの復活手順】
- 症状: BIOS リセットや更新トラブル等により、起動時に「Secure Boot Violation」と表示され、Windows が立ち上がらなくなる。
- 応急処置: BIOS 設定に入り、一時的に「セキュアブート」を 無効(Disabled) にして設定を保存します。
- ※これで一時的にセキュリティチェックをスキップして Windows を起動させます。
- 作業: 起動した Windows 上で、「セキュアブート回復メディア」を作成する。
- ※ここがポイントです。OS さえ起動できれば、後出しで「鍵」を作れます。
- 修復: 作成した USBメモリから PC を起動します。セキュアブート回復メディアの使い方と挙動
- ※この処理で、失われた 2023 年版の証明書が DB に再注入(Append)されます。
- 完了: 再度 BIOS 設定に入り、「セキュアブート」を 有効(Enabled) に戻す。 → 無事にセキュアブート ON の状態で Windows が起動します。
あなたの PCに「2023年の鍵」はあるか?
KB5074105 以降の更新は、BIOS(DB)内にすでに「Windows UEFI CA 2023」証明書が存在するデバイスに対してのみ、ブートマネージャーの置き換えを実行します。 つまり、「鍵がある人」ほど、更新後の BIOS リセットに注意が必要です。
以下の手順で、自分の PC が対象かどうかを確認しましょう。
方法1:専用ツールで簡単に確認する(推奨) 当サイトで配布しているチェックツールを使えば、ワンクリックで判定できます。 👉 Windows セキュアブート証明書チェッカーのダウンロード
方法2:PowerShell コマンドで確認する ツールを使わずに確認したい場合は、以下の手順を行います。
- スタートボタンを右クリック>「ターミナル(管理者)」をクリックします。
- 以下のコマンドをコピー&ペーストして実行してください。
[System.Text.Encoding]::ASCII.GetString((Get-SecureBootUEFI db).bytes) -match 'Windows UEFI CA 2023'判定結果:
- True(またはツールで「【Windows UEFI CA 2023】 – 有効期限:2035年6月」が表示されている)の場合:
- あなたの PC は対象です。 更新プログラムを適用すると、更新タスクが実行されると同時にブートマネージャーが最新署名版に書き換わります。万が一の起動不能トラブルに備え、必ずセキュアブート回復メディアを作成してください。
- False(または検出なし)の場合:
- 今回の「強制置換」の対象外です。現時点でのリスクは低いですが、将来的な全展開に備えて仕組みを理解しておくことをおすすめします。

「更新タスク」の詳細については、下記のページを参考にしてみてください。
対策法:セキュアブート回復メディアの作成
マイクロソフトは、この稀なケースによる起動不能トラブルを解決するために、専用の「回復メディア」を作成しておくことを強く推奨しています。
以前は OS 標準の「回復ドライブ」をベースにする手順が案内されることもありましたが、現在の UEFI 環境では大掛かりなシステムファイルは必要ありません。 FAT32 形式でフォーマットした空の USBメモリに、修復用のプログラムファイルを1つ配置するだけで、立派な専用修復メディアとして機能します。
【追記: 2026年3月20日 】手順の大幅な簡略化について 公開当初、 OS の「回復ドライブ」をベースとする手順をご案内しておりましたが、その後の検証により、単なる修復目的であれば空の USBメモリに必要なファイルを 1つコピーするだけで完了することが判明いたしました。過去の手順で作成されたメディアでも修復は可能ですが、これから作成される方は、以下のより簡単な手順を実施してください。
前提:以下の条件を満たす PC で作業してください
- 2024年7月9日以降の更新プログラムが適用され、
C:\windows\boot\efi\内にsecurebootrecovery.efiというファイルが存在していること。 - FAT32 形式でフォーマットされた USBメモリを用意すること(容量はごくわずかで構いません)
【実証済み】回復メディア作成前に「Secure Boot Violation」で起動しなくなった場合の救済策
【追記 2026年3月20日:注意喚起】修復ツールが使用できないデバイスについて
現在、 Microsoft の公式ドキュメントにて、以下の「既知の問題」に該当するデバイスおよび環境では、この修復アプリケーションを使用しないよう警告されています。
- HP 製の特定のデバイス( Sure Start Security 搭載機種)
- Arm64 ベースのデバイス( Qualcomm ファームウェア搭載機種)
- Apple 製の Mac ( T2 セキュリティチップ搭載機種での Boot Camp など)
- VMware 環境(仮想マシン上の Windows )
- Windows Server 2012 / 2012 R2 ( TPM 2.0 ベースのシステム)
- Symantec Endpoint Encryption がインストールされているシステム
上記の環境では、ファームウェア側の制約により修復ツールが正常に動作しなかったり、起動不能に陥ったりする既知の問題が報告されています。該当する PC をお使いの場合は本手順の実行を控え、 PC メーカー( OEM )からの公式なファームウェア更新をお待ちください。
詳細な条件については、以下の Microsoft 公式ドキュメント内にある「既知の問題」セクションをご確認ください。 ▶ Microsoft公式ドキュメント(セキュアブートの軽減策に関するページ)
STEP 1 : USBメモリに必要なフォルダーを作成する
※重要:以下、 USBメモリのドライブ文字をD:と仮定して解説します。
コマンドプロンプト(管理者)を開き、ドライブ文字を確認してから以下のコマンドを実行してください。D:の部分は、お使いの環境に合わせて変更してください。
コマンドプロンプトの開き方を見る
1.Windowsキー + R を押して「ファイル名を指定して実行」を開きます。
2.「cmd」と入力します。
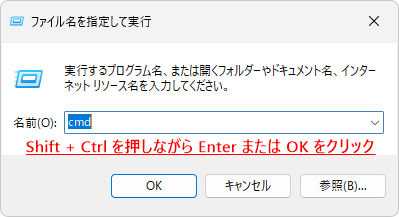
3.Shiftキー + Ctrlキーを押しながら Enter を押してください。

4.「ユーザーアカウント制御」が表示されたら「はい」をクリックします。

md D:\EFI\BOOT- 【解説】 USBメモリが起動する際に最初に読みに行く「標準の起動フォルダー(\EFI\BOOT)」を作成します。(※既に存在するというエラーが出た場合は、そのまま無視して次へ進んでください)

STEP 2 :鍵を直す「専用アプリ」をコピーする
続けて、以下のコマンドを実行します。
copy C:\windows\boot\efi\securebootrecovery.efi D:\efi\boot\bootx64.efiboot¥bootx64.efi を上書きしますか?(Yes/No/All):と聞かれたら、yを入力して Enter を押してください。
- 【解説】PC 内にある純正の修復ツール(
securebootrecovery.efi)を、 USBメモリの起動ファイル名(bootx64.efi)に変更して配置します。 UEFI はこのbootx64.efiを自動的に見つけて実行する仕組みになっています。 - Enterキーを押した後、画面に「1個のファイルをコピーしました。」と表示されたことを確認してください。

これで、「セキュアブート回復メディア」の完成です。コマンドプロンプトは閉じて構いません。
【関連リンク】
- 【独自検証】2026年セキュアブート問題でグラボが文鎮化?Microsoft公式サポートに直接聞いてみた結果
- 【警鐘】BIOS操作でPCが起動不能に?セキュアブート更新に備える「3つの対策」
- Windows セキュアブート証明書のバージョン・有効期限を調べる方法
【独自検証】別PCや非対応PCでも修復は可能か?
「セキュアブート回復メディア」は、作成した PC でしか使えないのか。それとも、他の PC でも使い回せる「万能薬」なのか。公式ドキュメントには記載のないこの疑問を解決するため、当サイトにて実機を用いた検証を行いました。
実機テスト:現役の BTO PC で作ったメディアをノートPC へ
まず、「メディアの汎用性」を確認するため、以下の環境でテストを実施しました。
- 作成環境: 正常に動作している現役の BTO デスクトップPC(Windows 11)
- 修復対象: 起動不能に陥ったノートPC(Windows 11)
通常、Windows の「回復ドライブ」は作成した PC 固有のドライバーなどを含むため他機への流用は推奨されませんが、この「セキュアブート回復メディア」に関しては、別個体の PC で作成したものでも問題なく動作することが確認できました。
非対応 PC(2015 年モデル)での復旧プロセス
さらに過酷な条件として、「Windows 11 非対応の 2015年モデル」のノートPC(回避策を用いてアップグレード済み)でも検証を行いました。
- 意図的な起動不能状態の作成: 2015年当時の古い設計を持つ BIOS(UEFI)から、DB 内の証明書を手動でクリア。公式が警告する「セキュアブート違反」の状態を意図的に再現しました。
- 修復の実行: 現役の BTO PC で作ったセキュアブート回復メディアをノートPC に接続し、修復プログラムを起動。
- 結果: 約 10 年の世代差があるにもかかわらず、証明書は正常に注入され、非対応PC が再び Windows 11 として起動することを確認しました。
検証結果:このメディアは「世代や機種を超えた救済手段」となる
今回の実機検証を経て、当サイトではこのメディアを「2023年署名を取り戻すためのマスターキー」に近い、極めて汎用性の高いツールであると結論付けました。
検証から得られた確信
- 信頼の再注入: このメディアの本質は、BIOS が忘れてしまった「Windows UEFI CA 2023」という共通の信頼を外から教え直すことにあります。
- 事後対策が可能: 自分の PC が 1 台しかなく、それが起動不能になってからでも、「別の PC でメディアを作って持ち込む」ことで救出できる可能性が大きく広がります。
- 古い PC ユーザーの命綱: メーカーからの BIOS 更新が期待できない非対応PC や古いマザーボードを使用しているユーザーにとって、このメディアは「詰み」を回避するための極めて強力な手段となります。
セキュアブート回復メディアの使い方と挙動
作成した回復メディアを使って、実際に起動しなくなった PC を修復する手順です。 当サイトでの検証に基づき、実際の挙動を解説します。
1. PC に回復メディアを挿入し、USBから起動する
作成した USBメモリを PC に挿入し、電源を入れます。 すぐにメーカー指定のキー(F12、F11、F8 など)を押して「ブートメニュー」を呼び出すか、BIOS 設定画面(F2、Del など)に入り、起動順位(Boot Priority)を変更して、USB メモリから起動するように指定してください。
※ USB メモリの名称は、「UEFI: (メーカー名) USB」のように表示されることが多いです。
参考: メーカー別 ショートカットキー一覧(BIOS / ブートメニュー)
| メーカー | ブートメニュー (推奨) | BIOS設定画面 |
| HP | F9 (または Esc) | F10 |
| Dell | F12 | F2 |
| Lenovo | F12 | F2 (または Fn+F2) |
| NEC / 富士通 | F12 | F2 |
| Dynabook (東芝) | F12 | F2 (または Esc+F1) |
| ASUS | F8 (または Esc) | F2 / Delete |
| MSI | F11 | Delete |
| Surface | (音量下+電源) | (音量上+電源) |
| 自作PC / BTO | F11 / F12 | Delete |
2.自動修復が実行される(操作不要)
このツールは全自動です。ユーザーが何かをクリックしたり入力したりする必要はありません。 画面には黒い背景に以下のような白い文字が表示されます
Microsoft Secure Boot Recovery Version 1.0
Visit https://aka.ms/securebootrecovery to learn more about this application.
Checking Secure Boot Certificate Configuration…
Updating the Secure Boot Certificate database with the Microsoft UEFI 2023 certificate…
Secure Boot Certificate database successfully updated.
System will reboot in 10 seconds.
日本語訳
Microsoft セキュアブート回復 バージョン 1.0
このアプリケーションの詳細については、https://aka.ms/securebootrecovery をご覧ください。
セキュアブート証明書の構成を確認しています…
Microsoft UEFI 2023 証明書を使用してセキュアブート証明書データベースを更新しています…
セキュアブート証明書データベースが正常に更新されました。
システムは 10 秒後に再起動します。
3.自動的に再起動して復旧完了
「データベースの更新に成功しました(successfully updated)」と表示された後、10秒で勝手に PC が再起動します。 これで BIOS 内の鍵穴(DB)に「2023年版」が補充されました。USBメモリを抜けば、今まで通り Windows が正常に起動します。
4. USBメモリを取り外す(重要) 画面が暗くなり、再起動が始まったら、すぐに USBメモリをパソコンから抜いてください。
- ブートメニュー(F12など)を使った場合: USB を抜くだけで OK です。設定は一時的なものなので、自動的に普段の Windows(HDD/SSD)から起動します。
- BIOS 設定で「起動順位」を変更した場合: USB を抜いた後、必要であれば BIOS 設定画面に入り、起動順位(Boot Priority)を元に戻してください。
これで、無事に Windows のサインイン画面が表示されれば修復完了です。
まとめ:チェックツールで「2023年署名」を確認したユーザーがすべきこと
今回の仕様変更により、Microsoft が警告する「DB(証明書データベース)のリセット」や「セキュアブート設定の変更(オン/オフ)」といった操作が、セキュアブート違反を引き起こし、「Windows 11 が二度と起動しなくなる」という深刻なトラブルに直結するリスクが生まれました。
当サイト配布の Windows セキュアブート証明書チェッカーで、「【Windows UEFI CA 2023】 – 有効期限:2035年6月」という表示が出た方は、KB5074105 の適用有無にかかわらず、いつトラブルが起きてもおかしくない状態です。
転ばぬ先の杖として、今のうちに「セキュアブート回復メディア」を作成しておくことを強く推奨します。 特に自作 PC ユーザーや、BIOS 設定(セキュアブート周り)を操作する機会がある方は、物理的な救急箱(スペアキー)として、この USBメモリを手元に 1本用意しておくと安心です。