今回は、Windows 11 のユーザーアカウントの設定で管理者アカウントを標準ユーザーに変更してしまった場合に、元の管理者アカウントに戻す方法を紹介します。
「ファイル名を指定して実行」に「netplwiz」と入力して Enter を押すと、ユーザーアカウント設定が表示され、アカウントの種類を変更することができます。


標準ユーザーに変更した直後にサインアウトをするか聞かれますが、サインアウトをする前であれば管理者アカウントに戻すことができます。
しかし、サインアウトをしてしまうと、それ以降は「netplwiz」が実行できなくなってしまい、「ユーザーアカウント制御」の画面にも「いいえ」のみが表示され何もできなくなってしまいます。

このように、1つしかない管理者アカウントを標準ユーザーに変更してしまうと管理者権限が必要な操作ができなくなりますので注意してください。
ただ、今回紹介する方法で元に戻すことができるので心配不要です。
管理者アカウントを標準ユーザーに変更してしまった場合の戻し方
1.スタートボタンの右クリックから「再起動」をする際に、Shift キーを押しながら「再起動」をクリックします。
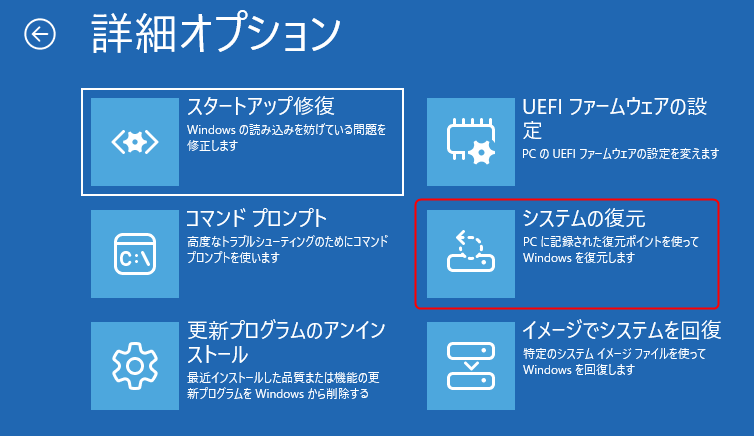
2.Windows 回復環境(WinRE)が開きますので、「トラブルシューティング」をクリックします。

3.「詳細オプション」をクリックします。

4.「スタートアップ設定」をクリックします。

5.右下の「再起動」をクリックします。

6.キーボードの F4 キーを押します。

7.セーフモードで Windows 11 が立ち上がりますので、「ファイル名を指定して実行」に「netplwiz」と入力して Enter を押します。
8.すると、「ユーザーアカウント制御」が表示され、Administrator のパスワードが入力できるようになっていますので、パスワードを設定したことがなければそのまま「はい」をクリックします。

※Administrator のアカウントを有効にする必要はありません。
9.標準ユーザーに変更してしまったアカウントのプロパティを開き、「管理者」に変更して OK をクリックします。

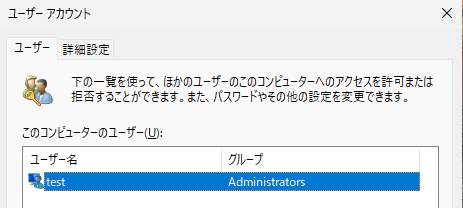
10.次のように「グループ」が「Administrator」に変わっていれば設定は完了ですので、OK をクリックしてスタートボタンから PC を再起動してください。

PC が起動すると元通りの管理者アカウントになっていますので、設定などを開いてみましょう。

【緊急】管理者権限を失いWinREも操作不能な場合の最終手段
まず、現在の WinRE 画面から抜け出すには:
現在、PC が「オプションの選択」などの青い画面(Windows 回復環境)で停止し、マウスもキーボードも操作できない状態になっている場合は、PC 本体の電源ボタンを 10 秒以上長押しして、強制的に電源を切ってください。
通常、管理者アカウントを標準ユーザーに変更してしまった場合、この記事で解説しているように Windows 回復環境(WinRE)からコマンドプロンプトを使って管理者権限を復旧させます。
しかし、2025年10月の Windows Update (KB5066835 と同時にインストールされる KB5067039) の影響で、回復環境(WinRE)でマウスやキーボードが反応しなくなるという別の不具合が同時に発生している場合があります。
▼この不具合の詳細はこちらの記事を参照
【解決】WinREのマウス・キーボードが動かない問題、KB5070773で修正完了
この「管理者権限がない」と「WinRE が操作不能」という 2つの問題が同時に発生すると、PC 単体では管理者権限を復旧させることができず、まさに「詰み」の状態に陥ってしまいます。
この最悪の状況から脱出するための唯一の方法が、外部の Windows 11 インストールメディア(USBメモリ)を使用し、システムの復元を実行することです。
必要なもの
- Windows 11 インストールメディア(USBメモリ)
インストールメディアをお持ちでない場合は、下記のページを参考に、管理者権限のある別の PC でインストールメディアを作成してください。
Windows 11 メディア作成ツールの使い方|エラー解決法も解説
インストールメディアを作成する「メディア作成ツール」の実行には管理者権限が必要なため、現在お使いの PC では作成できません。ご友人やご家族の PC などを借りて作成してください。
解決手順
ステップ1.問題の PC を USBメモリから起動(ブート)する:
1.作成した USBメモリを問題の PC に接続します。
2.PC の電源を入れ、すぐに特定のキー(例:F12, ESC, F2など、メーカーにより異なる)を押してブートメニューを呼び出し、「USB Drive」や「UEFI: (USBメモリ名)」などを選択して USB から起動します。
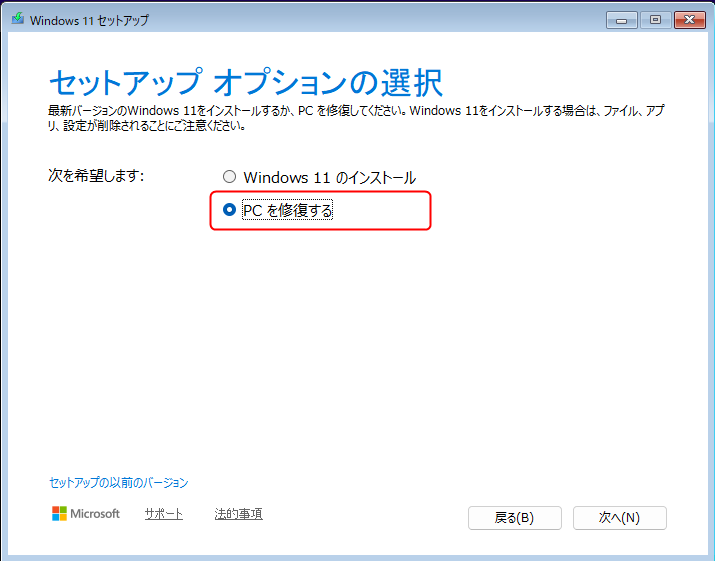
ステップ2.「PC を修復する」を選択:
1.Windows 11 セットアップ画面(言語選択)が表示されたら、「次へ」をクリックします。

2.キーボード選択画面も同じように「次へ」をクリックします。

3.セットアップオプションの画面で「PC を修復する」をクリックします。
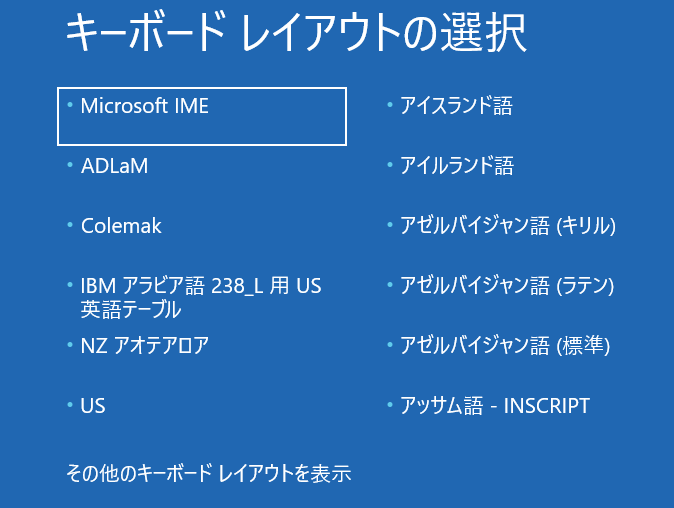
4.キーボードレイアウトは「Microsoft IME」を選択します。
ステップ3.システムの復元を起動:
1.青い「オプションの選択」画面が表示されたら、「トラブルシューティング」>「システムの復元」を選択します。(USB メディア内の正常な回復環境なので、キーボードが使えるはずです)
ステップ4.システムの復元:
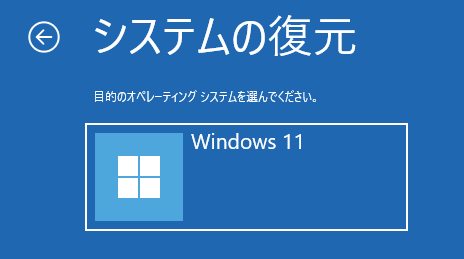
1.「目的のオペレーティングシステムを選択してください。」と表示されますので、復元したい OS(通常は「Windows 11」)を選択します。
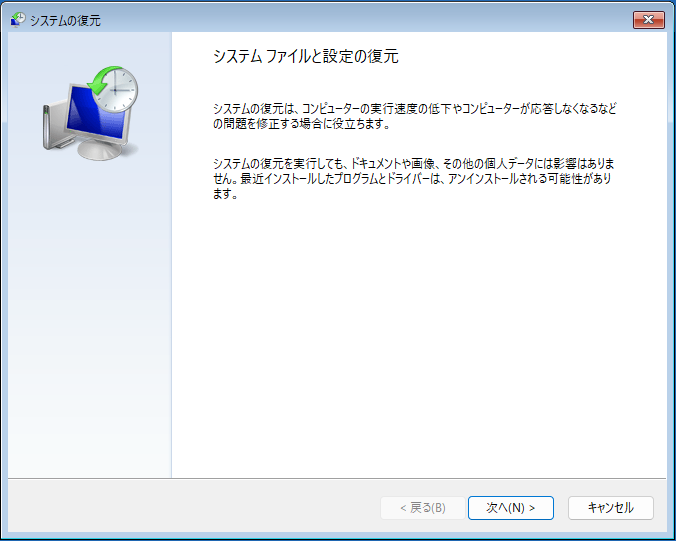
2.システムの復元が起動しますので、「次へ」をクリックします。
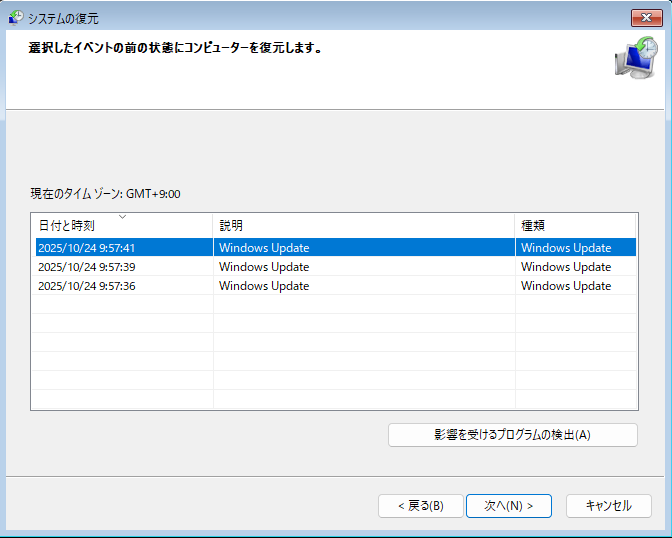
3.日付と時刻を確認し、問題の発生する前のポイントを選択して「次へ」をクリックします。
4.内容を確認し、「完了」をクリックします。

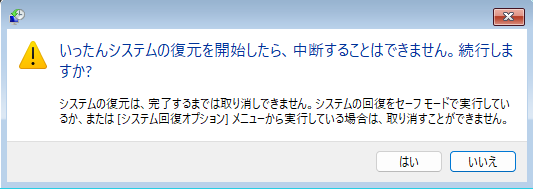
5.「いったんシステムの復元を開始したら、中断することはできません。続行しますか?」と聞かれますので、内容を確認して「はい」をクリックします。
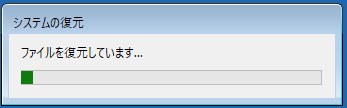
6.すると、システムの復元が開始します。
7.システムの復元が無事完了すると、次の画面が表示されますので、「再起動」をクリックしてください。
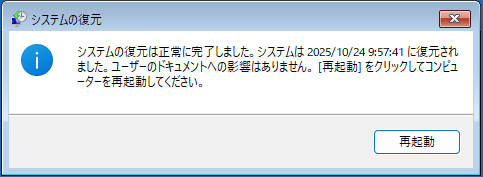
システムの復元完了
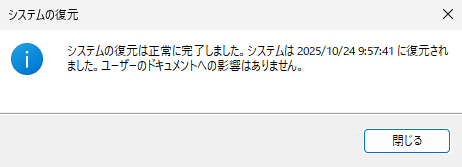
8.Windows が通常起動したら、問題のアカウントでサインインしてください。「システムの復元は正常に完了しました。」と表示されますので、「閉じる」をクリックします。
9.Windowsキー + R を押して「ファイル名を指定して実行」を開き、「netplwiz」と入力して Enter を押し、管理者アカウント戻っているかを確認してみましょう。